Air quality monitor
Air quality monitor integrated to TrueNAS
Background
The need of monitoring internal air quality, temperature and humidity was there for some time, so I've decided to implement it using state-of-the-art tools and environments out there. CO2 measurement was an optional requirement, therefore I chose BME680 gas sensor, integrated with TrueNAS, as I have TrueNAS already running for some time at home.
The Home Assistant [BROKEN LINK: [J]] frontend - exits as TrueNAS plugin - seems a great option for subscribing to the sensor data and visualizing it.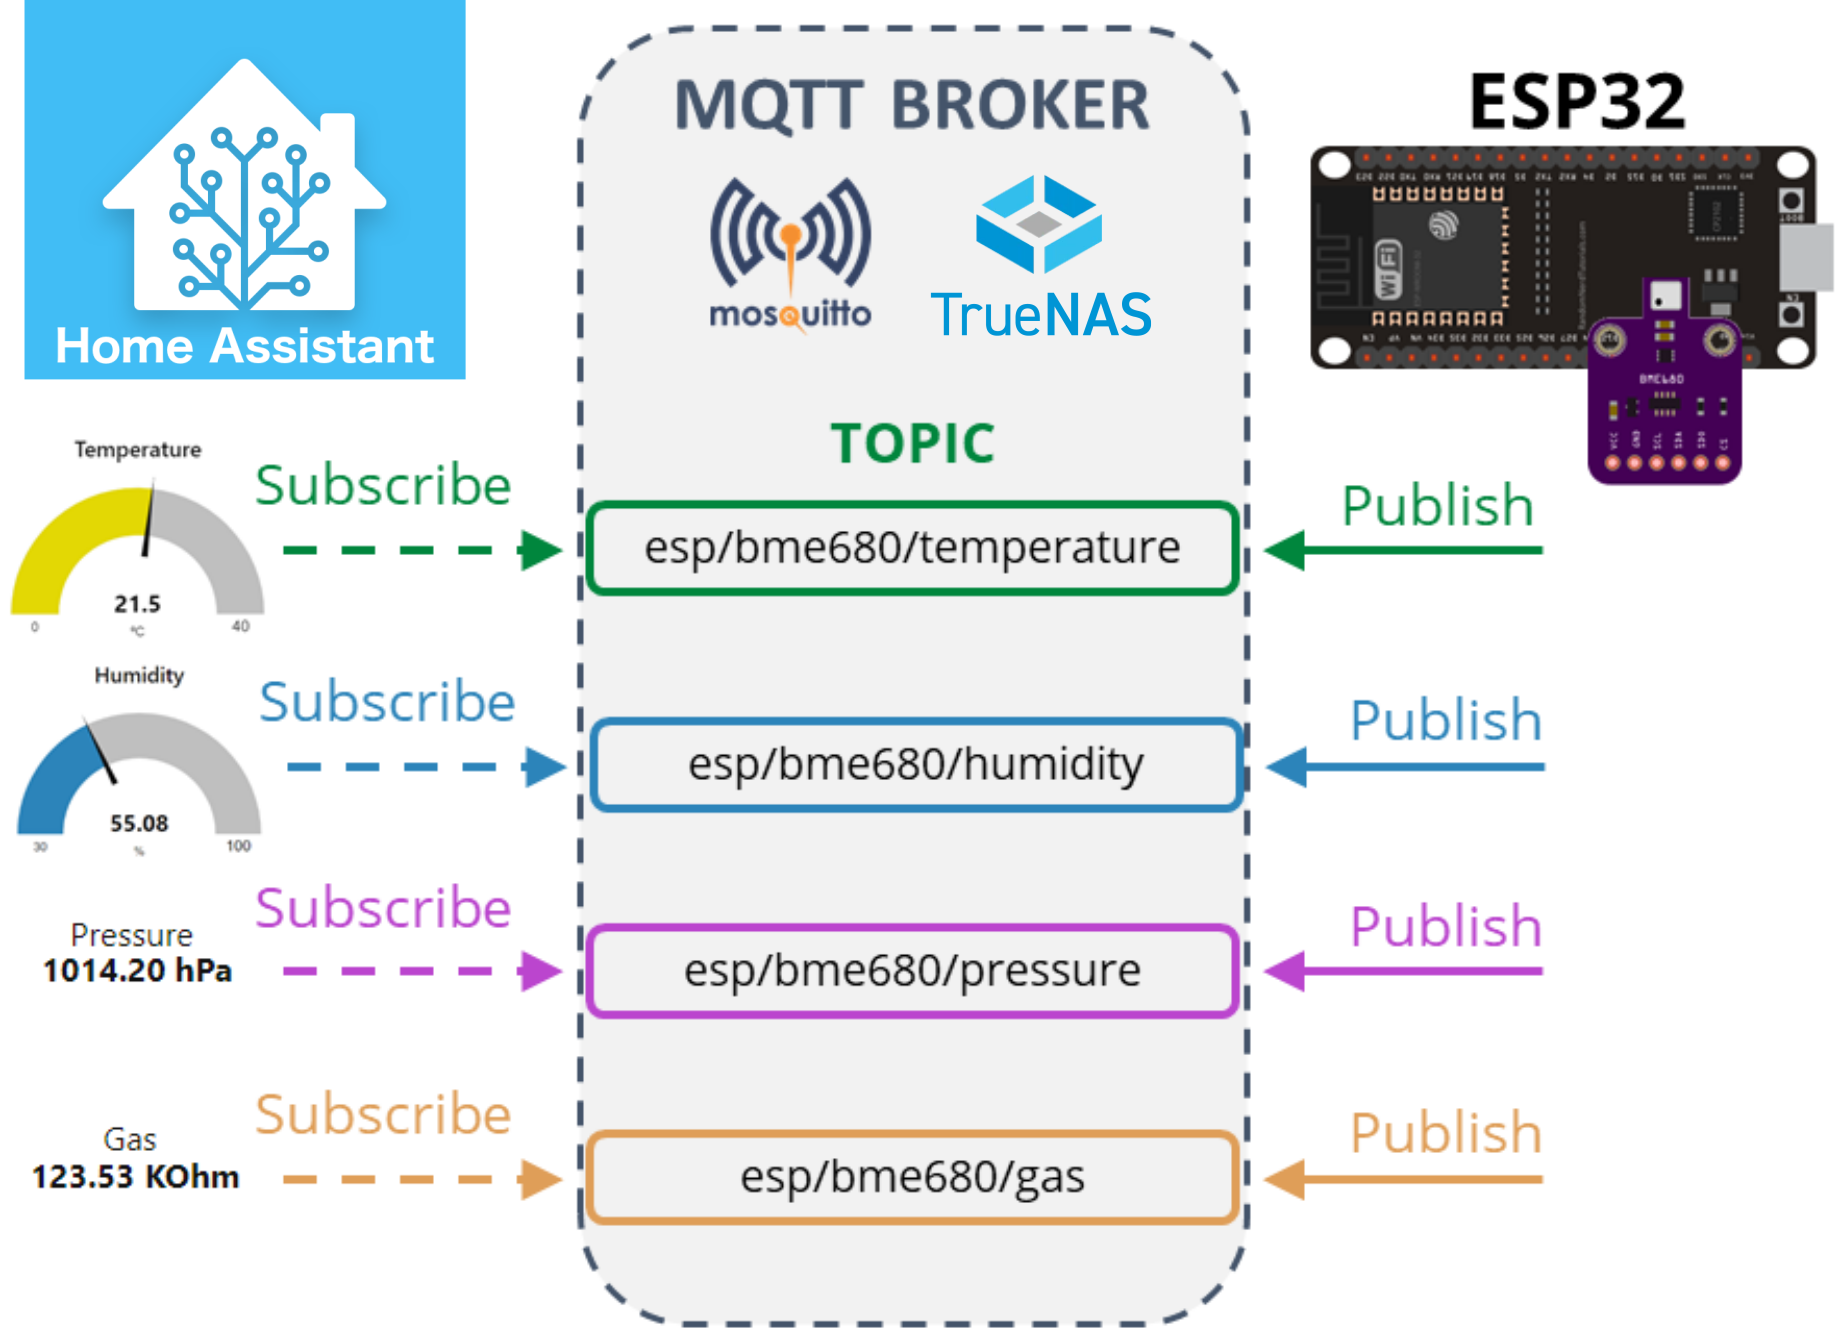
The sensor is the BME680, gas sensor measuring relative humidity, barometric pressure, ambient temperature and gas (VOC). [BROKEN LINK: [A]]
The microcontroller is an ESP32 [BROKEN LINK: [D]] development board for simplicity.
Schematics
Wire the BME680 to the ESP32 with the SDA pin connected to GPIO 21 and the SCL pin connected to GPIO 22. Connect GND and 3V3 supply lines too.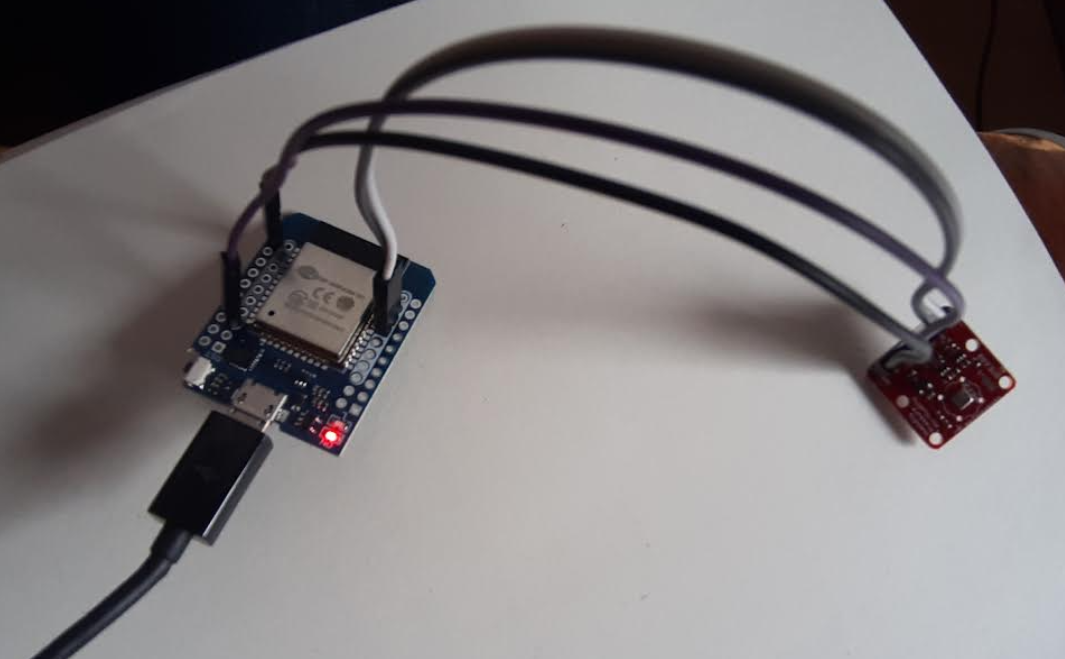
Software
System interfacing based on MQTT [BROKEN LINK: [G]].
- The ESP32 requests sensor readings from the BME680 sensor.
- The temperature readings are published in the esp/bme680/temperature topic;
- Humidity readings are published in the esp/bme680/humidity topic;
- Pressure readings are published in the esp/bme680/pressure topic;
- Gas readings are published in the esp/bme680/gas topic;
- TrueNAS (Home Assistant) is subscribed to those topics;
- TrueNAS (Home Assistant) receives the sensor readings and then displays them on gauges and text fields;
- You can receive the readings in any other platform that supports MQTT and handle the readings as you want.
Arduino IDE
The ESP32 uses Arduino IDE, so make sure you have the ESP32 add-on installed. [BROKEN LINK: [I]]
Library dependencies
The following libraries have to be installed in order to build the code and to satisfy the dependencies.
Async MQTT Client Library
To use MQTT with the ESP32 we’ll use the Async MQTT Client Library.
Installing the Async MQTT Client Library
- Click here to download the Async MQTT client library. You should have a .zip folder in your Downloads folder
- Unzip the .zip folder and you should get async-mqtt-client-master folder
- Rename your folder from async-mqtt-client-master to
async_mqtt_client - Move the
async_mqtt_clientfolder to your Arduino IDE installation libraries folder - Finally, re-open your Arduino IDE
Alternatively, you can go to Sketch > Include Library > Add . ZIP library and select the library you’ve just downloaded.
Async TCP Library
To use MQTT with the ESP, you also need the Async TCP library.
- Click here to download the Async TCP client library. You should have a .zip folder in your Downloads folder
- Unzip the .zip folder and you should get AsyncTCP-master folder
- Rename your folder from AsyncTCP-master to AsyncTCP
- Move the AsyncTCP folder to your Arduino IDE installation libraries folder
- Finally, re-open your Arduino IDE
Alternatively, you can go to Sketch > Include Library > Add . ZIP library and select the library you’ve just downloaded.
Note:
Don't install the ESPAsyncTCP library, as requested by Async MQTT Client, as it is not compatible.
BME680 Sensor Libraries
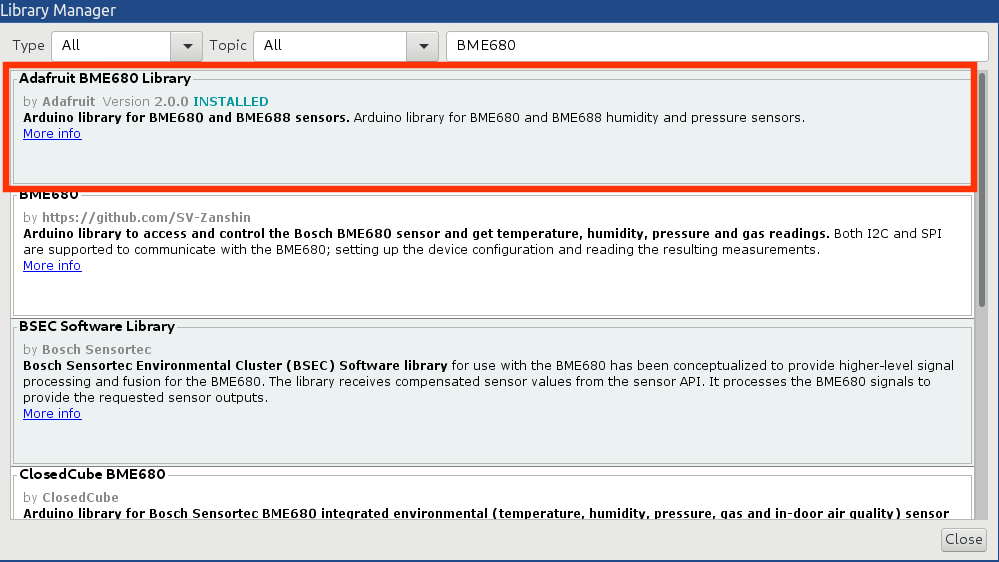
To get readings from the BME680 sensor module, we’ll use the Adafruit BME680 library. You also need to install the Adafruit Sensor library. Follow the next steps to install the libraries in your Arduino IDE:
- Open your Arduino IDE and go to Sketch > Include Library > Manage Libraries. The Library Manager should open.
- Search for "adafruit bme680" on the Search box and install the library.
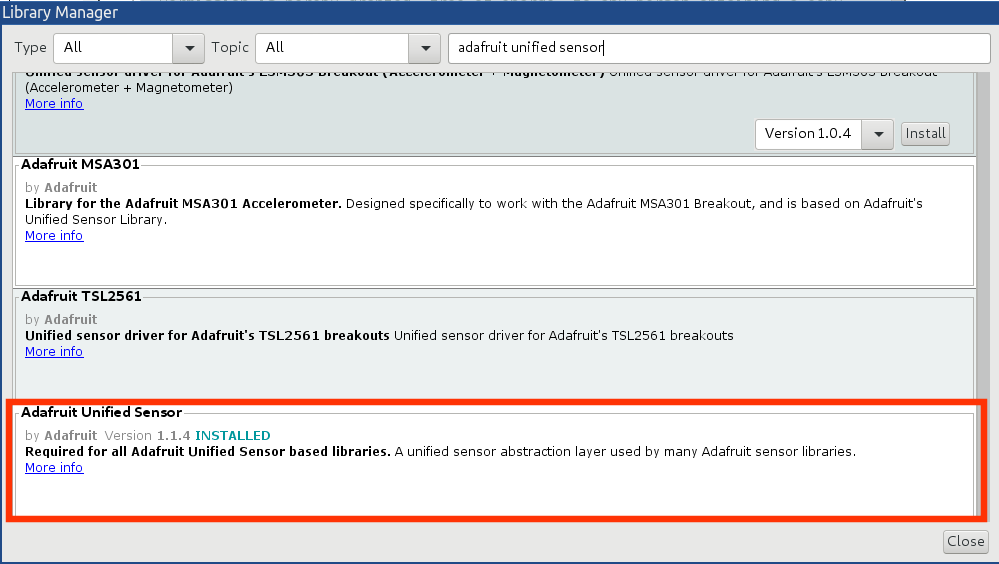
To use the BME680 library, you also need to install the Adafruit Unified Sensor. Follow the next steps to install the library in your Arduino IDE:
- Search for "Adafruit Unified Sensor" in the search box. Scroll all the way down to find the library and install it.
After installing the libraries, restart your Arduino IDE.
Library hacking
Due to library compatibility issues with ESP32 vs. ESP8266, I applied the following changes to the library code:
Comment the ESP.getChipId() call: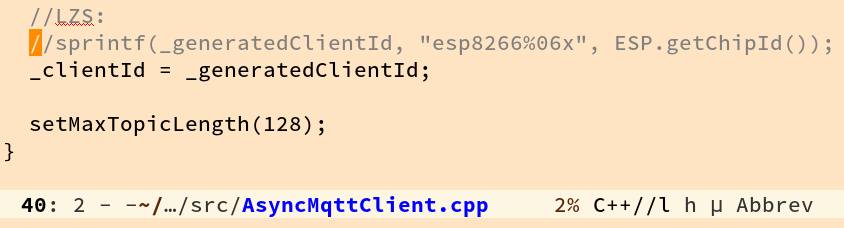
Include AsyncTCP.h instead of ESPAsyncTCP.h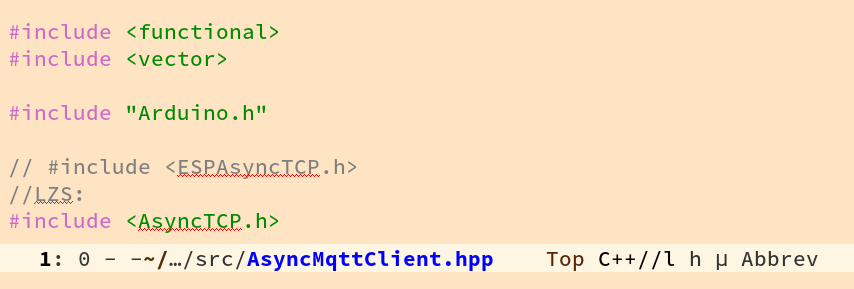
Build and flash the ESP32
The code for the ESP32 can be found here: https://github.com/zwwerg/air_quality_monitor
For the board setup, my board config esd the following:
First debug log, through the serial console, after flashing the ESP32: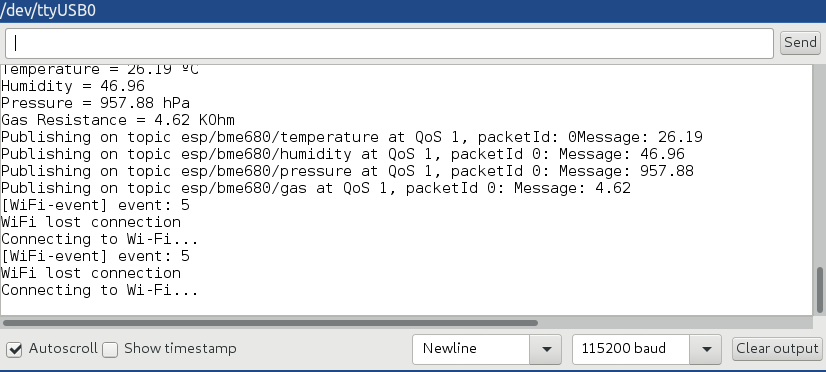
After a successful wifi connection: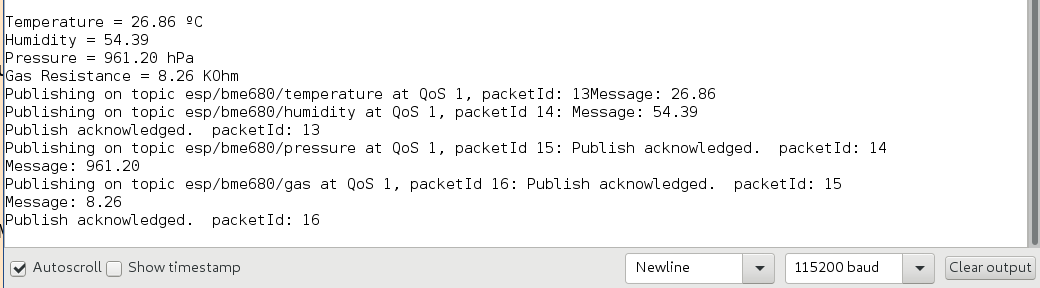
MQTT Broker
To use MQTT, you need a broker. We’ll be using Mosquitto broker installed on a TrueNAS. 8 The plugin installation is painless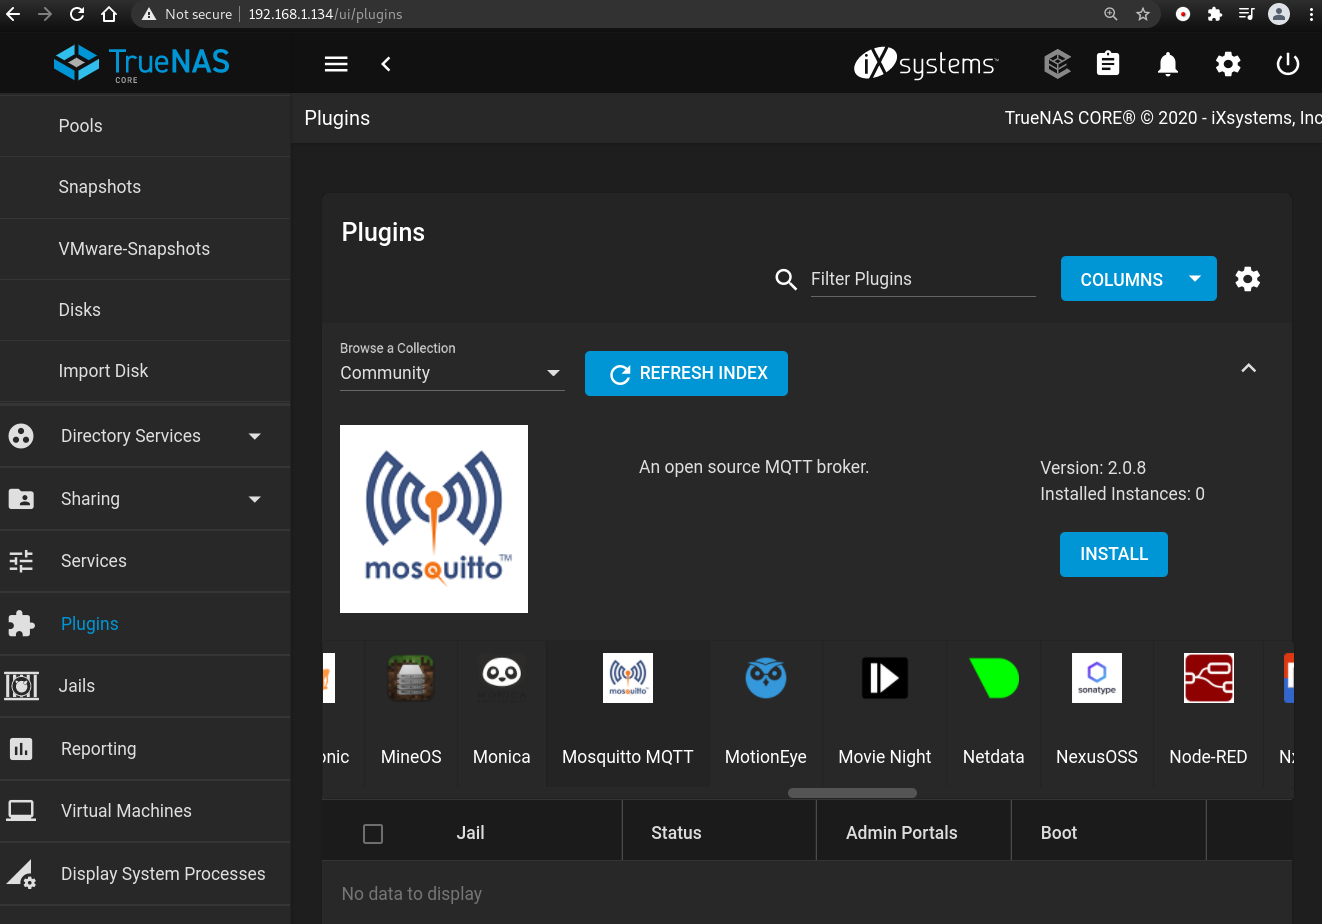
MQTT Subscriber - Home Assistant
The ESP32 is publishing sensor readings every 10 seconds on four MQTT topics. Now, we can use any dashboard that supports MQTT or any other device that supports MQTT to subscribe to those topics and receive the readings.
Installation of the Home Assistant is done through the TrueNAS plugin installation surface, it was painless after setting up the jail correctly.
As an example, we’ll create a simple flow using Home Assistant to subscribe to those topics and display the readings on gauges. The Home Assistant dashboard can be accessed through the jail's IP address, and not through TrueNAS.
The MQTT integration 11 has to be installed using the Home Assistant dashboard. (Home->Configuration->Integrations->+Add Integration)
Configuration of the MQTT subscriber is not possible in the UI, however it is possible to subscribe to a topic, in order to see everything works fine with the sensor and the MQTT broker.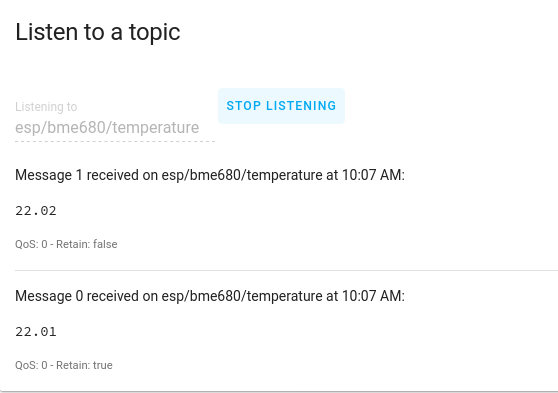
In order to subscribe and hook the sensor to a gauge, the configuration.yaml of the Home Assistant has to be edited. I have done this through SSH, accessing the file directly from the file system.
## LZS MQTT sensor test
sensor 1:
  - platform: mqtt
    name: "Living room temperature #1"
    state_topic: "esp/bme680/temperature"
    unit_of_measurement: "°C"
Location of the configuration of the Home Assistant:
/mnt/pool0/iocage/jails/home-assistant/root/home/homeassistant/homeassistant/configuration.yaml
After performing a restart, the temperature reading can be accessed through the dashboard.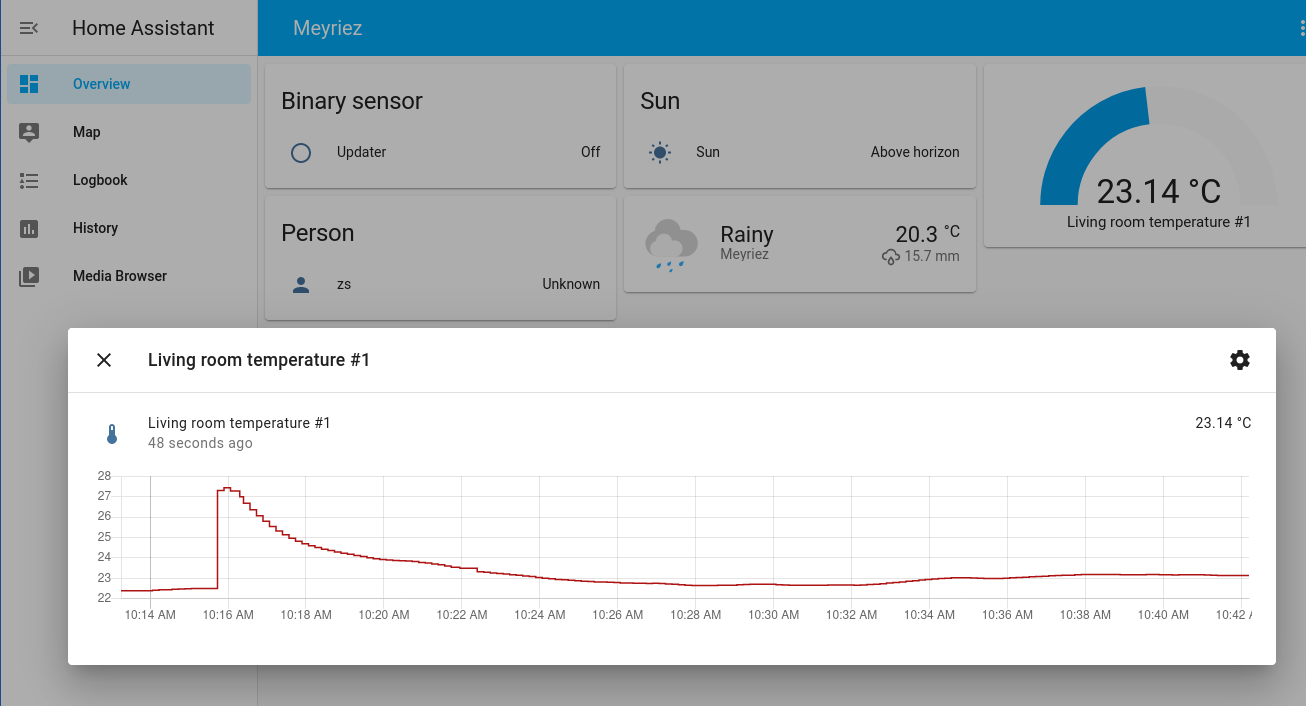
Next steps
TODO 3D printed enclosure
I plan to design and print an enclosure for the sensor, and deploy many around the house.
TODO Power saving
Sleep mode with periodic wakeup. Plan is to have ~10s measurement period.
References
- ESP32 MQTT – Publish BME680 Temperature, Humidity, Pressure, and Gas Readings (Arduino IDE)
- Build an air quality monitor with InfluxDB, Grafana, and Docker on a Raspberry Pi
- Hackaday: AN AIR QUALITY MONITOR THAT LEVERAGES THE CLOUD
- Bastelgarage: ESP32MiniKit Wemos
- Bosch BME680
- Bastelgarage: BME680 Breakout Luftfeuchtigkeits-, Druck-, Temperatur- & Luftgütesensor
- What is MQTT and How It Works
- TrueNAS Plugins
- Installing the ESP32 Board in Arduino IDE
- Home Assistant
- Home Assistant MQTT Integration
https://github.com/marvinroger/async-mqtt-client https://github.com/me-no-dev/AsyncTCP